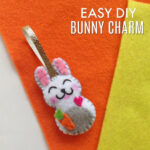
How to Make a Bunny Charm - Easter Craft for Kids
Easter felt crafts are so fun! Learn how to make a Bunny Charm. DIY Easter crafts are so simple. Kids will love this easy bunny craft! Find Easter craft ideas for kids. Easter crafts for kids they will love!
Yield: 1
Equipment
- Felt – at least 5 different colors
- Scissors
- Bunny template - print here
- 2b pencil or black gel pen – for tracing the template on felt
- Needle and thread ( I love the sewing kits)
- Pink highlighter – optional but so cute!
- ribbon
Instructions
- Print and then cut out the patterns from the template.
- Place the template patterns on the selected felt fabrics and trace around the sides using 2b pencil or black gel pen. Cut out the patterns nicely.
- Take any one of the body parts and draw the face details on it using a black gel pen. Prepare black thread and a needle to stitch the traced face details of the bunny. Stitch neatly and evenly.
- Prepare a lighter colored thread in a needle and start stitching the other parts on the front body part.
- You can do running stitch or flat blanket stitch to attach the other parts. In choosing the needle, keep in mind to choose smaller needle for smaller (size) projects).
- Now take the other body part (back side) and place it under the patterned part (with the patterned part facing up).
- Start stitching the body parts from anywhere but make sure to stop when you cross the first ear; also keep a small opening for stuffing.
- Take a small piece of ribbon (around 4 to 5 inches should do) and fold it into half, creating a loop. Place 1 or 2 cm of the open ends of the ribbon in between the body parts at the bottom end.
- Now stitch the ribbon and the body parts together to join them. Continue to stitch but keep a small opening for the stuffing.
- Cut the left over felts into smaller pieces; we’ll be using these for the stuffing. Insert the scrap felt pieces through the small opening.
- Once you are done stuffing stitch and close the open end nicely. Use a pink highlighter to add blush shades on both cheeks of the bunny and your charm is ready!