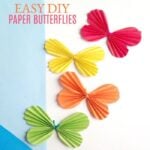
Easy Paper Butterfly Craft for Kids
Are you looking for something fun to do with the kids that is simple yet really fun? Try making this Easy Paper Butterfly Craft that everyone is sure to love! The bright and cheery colors are perfect for Spring!
Yield: 1
Equipment
- Colored craft paper
- Scissors
- Craft glue
- pencil or marker – to trace template
- Template cut outs - print Butterfly Template here.
- Yarn (I like to match the yarn to the butterfly color)
Instructions
- Use a pencil or marker to trace the 2 template patterns on the selected colored craft paper. The template includes 2 patterns, upper wings and lower wings.
- Make accordion folds on the wing patterns. Try to keep the folds small and even. This will make for a more uniform final product.
- Take the lower wing pattern and apply a drop of glue on the top middle part of the wing pattern. Be careful to not use too much glue.
- Take the upper wing pattern and attach it with the lower wing pattern by joining both patterns on the glued side. Squeeze the joint part to make sure that the wings are attached nicely. You will want to make sure they are well secured. Hold for a few minutes to make sure the glue sets.
- Cut a small piece of yarn thread and 2 knots around the joint part of the wings. Keep in mind to tie 2 knots. After tying the knots, keep enough yarn thread at both open ends for the antenna pattern and then cut off extra yarn if required.
- Once you are finished tying the yarn, spread the folds of each wing carefully and nicely. You want to do this gently so the wings do not become torn.